
Set up a Star Micronics network printer
Give the printer a fixed address on your network and connect it to Quid, step by step with pictures.
This guide is for Star printers that connect to your network with a cable (LAN / Ethernet), such as the TSP100 LAN and the TSP700II with a network interface.
It has three parts. Allow about 20 minutes.
You will see the words IP address. Every device on your network has one. It is a set of four numbers with dots, like 192.168.0.106, and works like a phone number that other devices use to reach it.
Part 1: find the printer's address
- Load paper, and connect the printer to your router with a network cable.
- Switch the printer off.
- Hold down the FEED button and switch the printer on. When paper starts to come out, let go.
- Wait. The printer prints a first slip, and about a minute later a second one.
- At the bottom of the second slip, find the line IP Address. Write the numbers down.
Part 2: give the printer a fixed address
By default your router gives the printer an address that can change from day to day. If it changes, Quid can no longer find the printer. A static address never changes.
- On a computer or tablet connected to the same network, open a web browser. In the address bar, type the IP address from the slip and press Enter. The printer's own settings page opens.
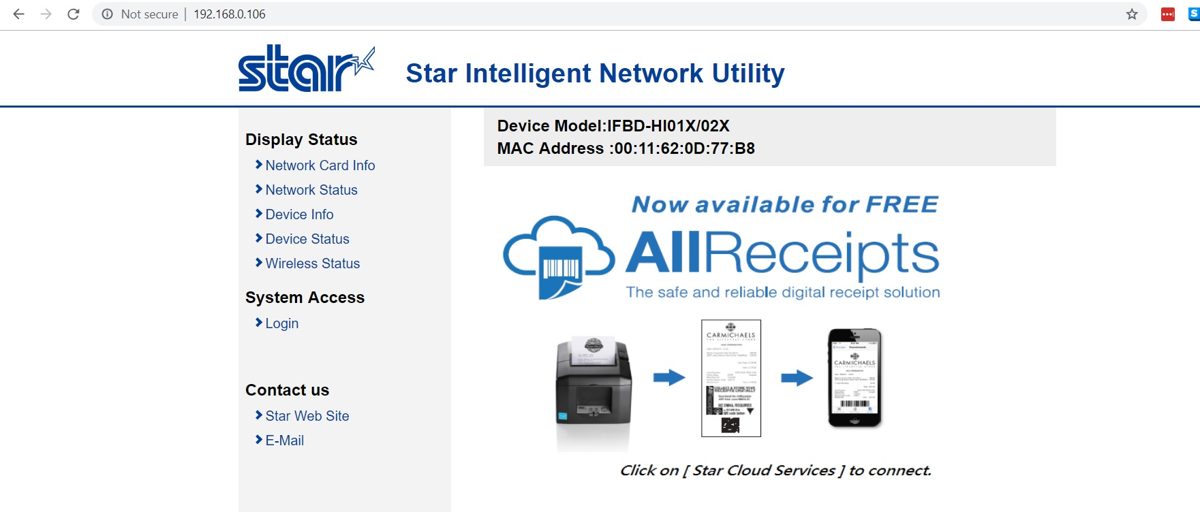
The printer's settings page. - Click Login. The standard username is root and the password is public.
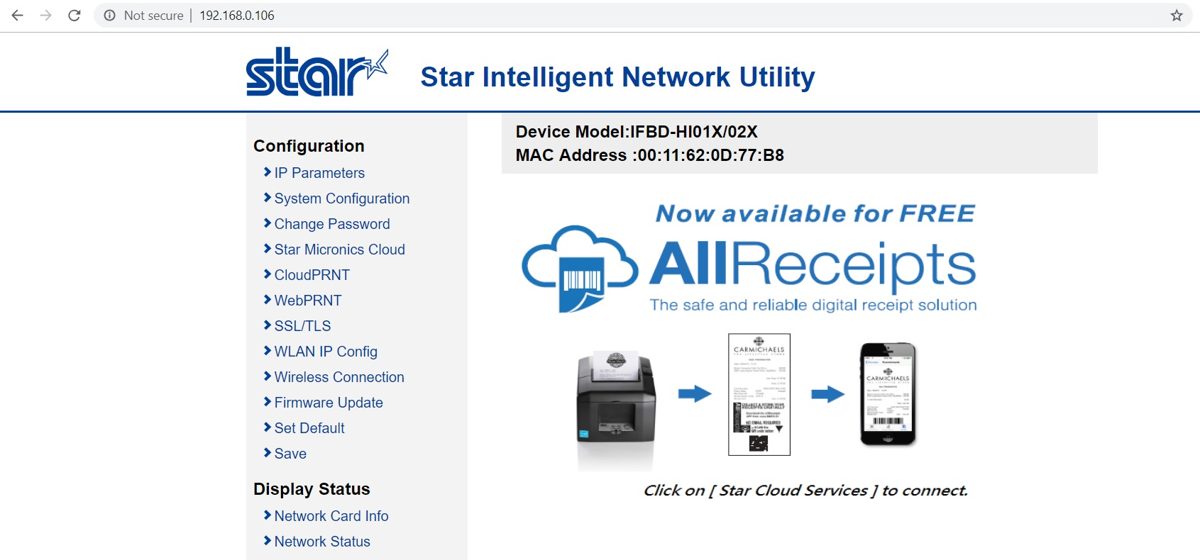
After logging in. - Click IP Parameters at the top of the menu.
- Select Static. Fill in the IP address you want the printer to keep (using the one it has now is simplest), and the subnet mask and gateway. If you are not sure about these, ask whoever set up your internet, or copy them from the slip the printer printed.
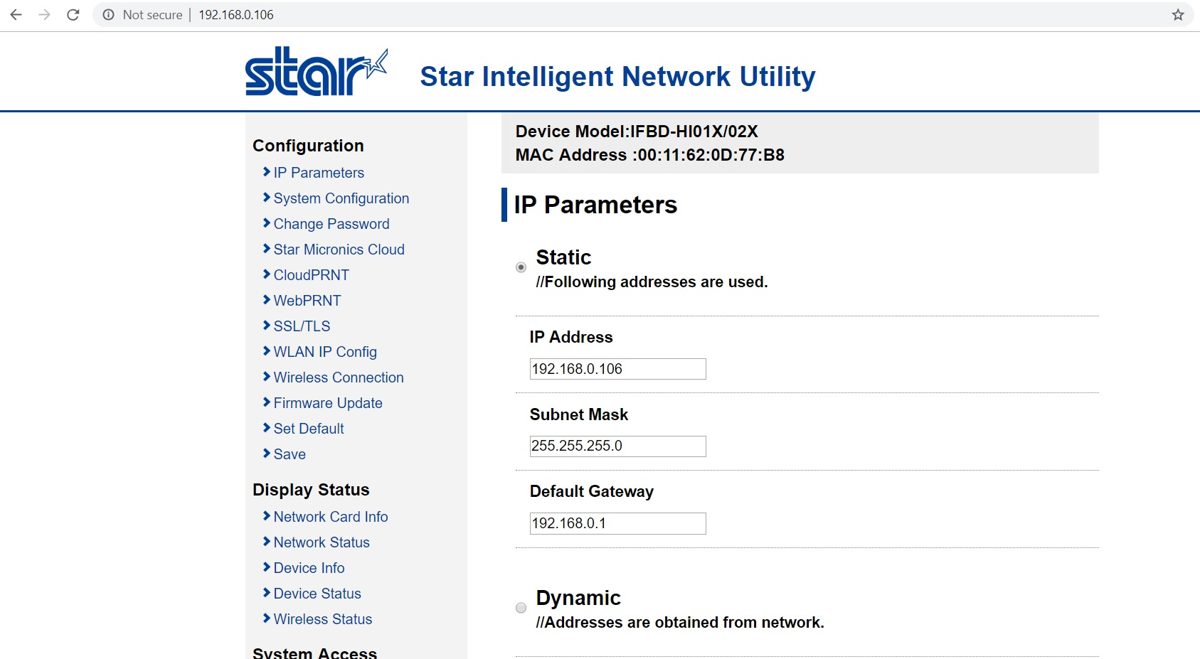
Choose Static and fill in the address. - Click Submit at the bottom of the page.
- Click Save in the menu, then choose "Save, Configuration printing, Restart device" and click execute. The printer restarts with its fixed address.
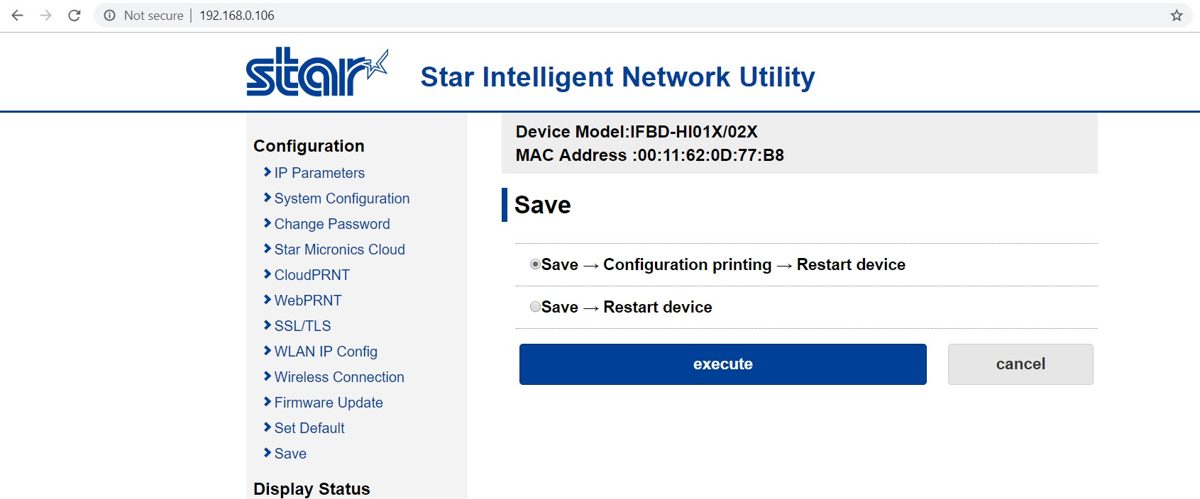
Save and restart.
For safety, change the printer's password from "public" to something of your own (menu: Change Password) once everything works.
Part 3: connect the printer in Quid
- In Quid, go to .
- On your register, click Configure Receipt Printer.
- Choose the printer from the list of connected printers, or enter its IP address. Give it a name (for example "Front counter") and choose the paper width.
- Click Test Configuration. The printer should print a test slip.
- Save.
Only if you print sticky labels (TSP700II)
Label rolls have a black mark between labels so the printer knows where each one ends. The printer has to be told to look for it.
- On a Windows computer on the same network, download and install Star's printer software ("StarPRNT" or "Star Quick Setup Utility") from the support pages at starmicronics.com.
- Open Printer Utility Star PRNT.
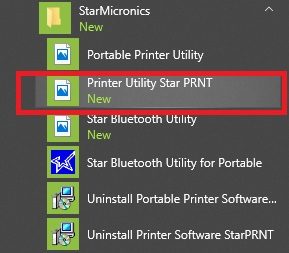
Open Printer Utility Star PRNT. - Choose your printer model (TSP700II) and click Next.
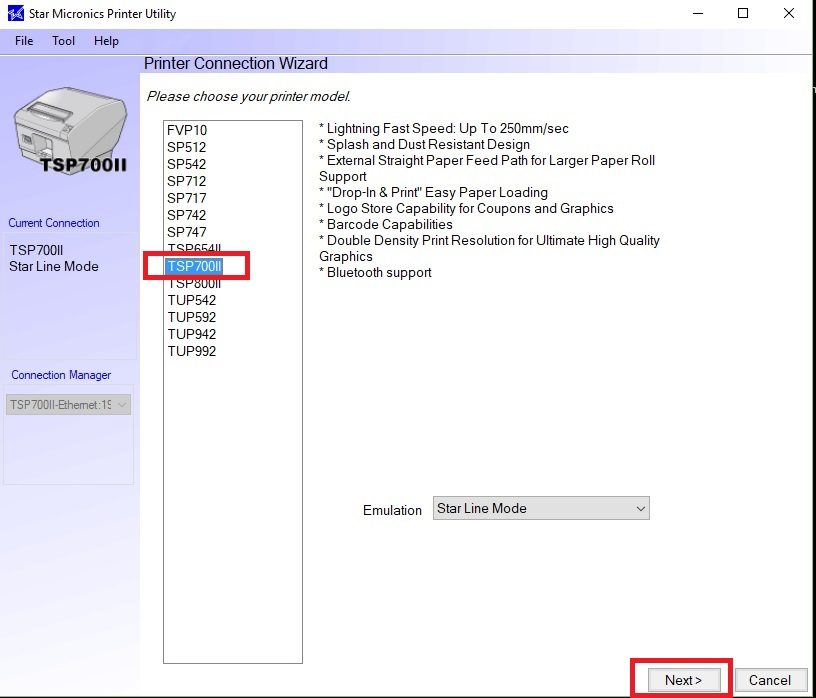
Pick the model. - Select Ethernet, type the printer's IP address and click Done.
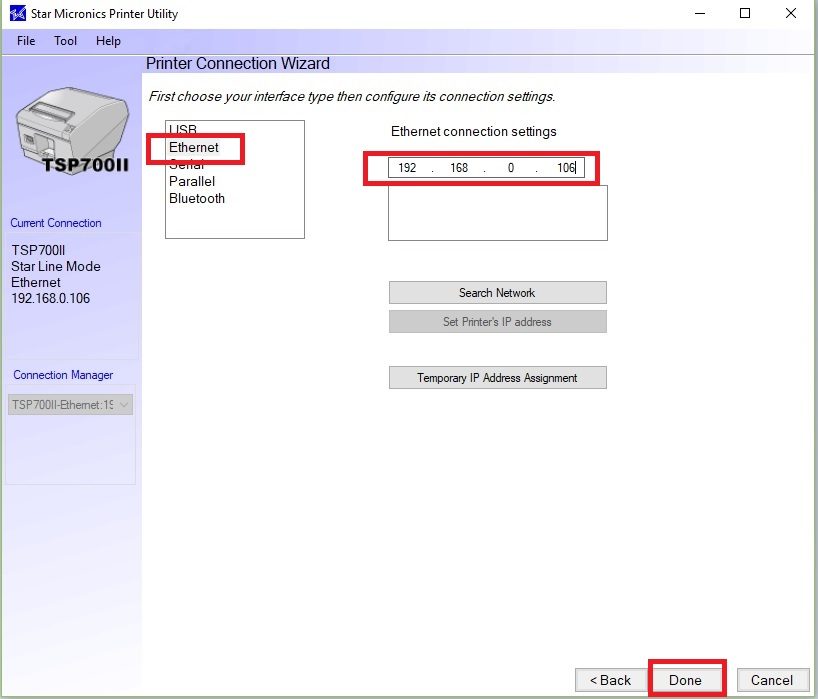
Ethernet, then the IP address. - Open Printer Settings.
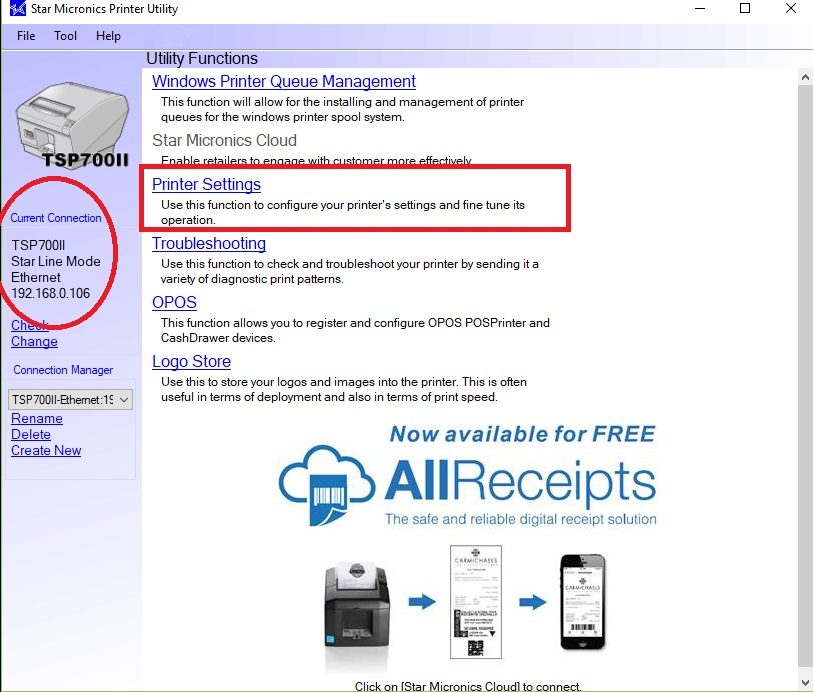
Printer Settings. - Find Black Mark Function, set it to Enable, and click Store.
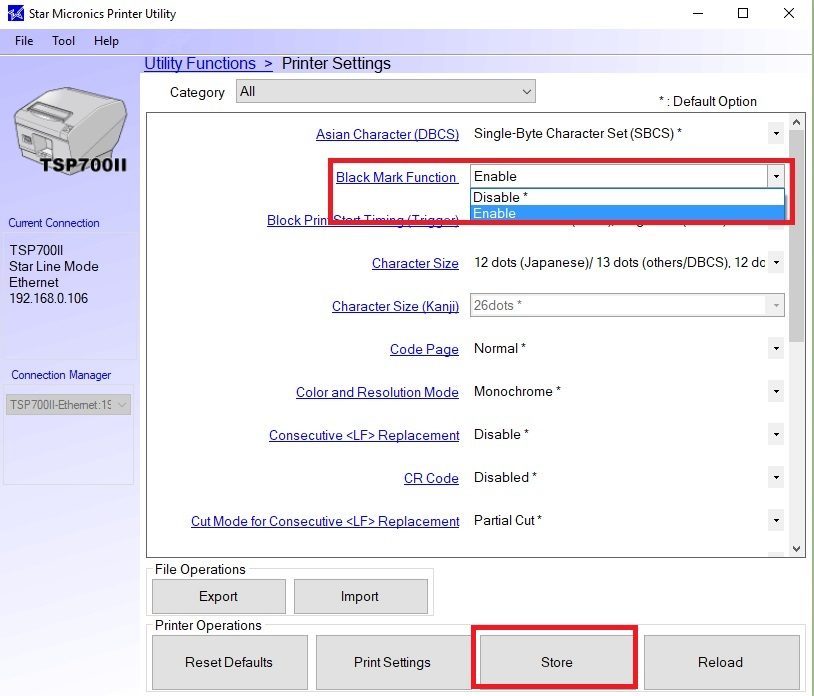
Enable the black mark and click Store.
Something not working? See The printer is not working.
NextPrint order slips for a kitchen, bar or workshop →